 ultimate-guide
How to Pack Fragile Antique Furniture Safely
Table of Contents
- What You'll Need Before You Start Packing
- Step 1: Assess and Photograph Your Antique Furniture
- Step 2: Choose the Best Packing Materials for Antique Furniture
- Step 3: How to Protect Wood Finish During a Move
- Step 4: Wrap and Cushion Delicate Legs, Carvings and Veneers
- Step 5: Secure Items During Transit and Loading
- Moving Insurance for High-Value Items: What You Need to Know
- Common Mistakes to Avoid When Packing Antiques
- Frequently Asked Questions
Last Updated: September 10, 2026
What You'll Need Before You Start Packing
Packing fragile antique furniture is the process of stabilising, cushioning and protecting aged wooden pieces so they survive a house move without cracks, scratches or structural damage. It is slower and more methodical than packing modern flat-pack furniture, and the materials matter as much as the technique.
This guide from Fletcher Removals and Storage covers the full sequence, from photographing each piece to loading it on the van. Before you touch a single roll of bubble wrap, gather the right kit. Using the wrong materials is the single most common reason antique pieces arrive damaged.
Here is your packing kit for a typical move:
- Acid-free tissue paper and unbleached packing paper
- Soft cotton cloths or old cotton sheets
- Bubble wrap (small and large bubble)
- Foam pipe insulation or foam tubing
- Cardboard corner protectors
- Low-tack masking tape and packing tape
- Furniture blankets and moving straps
- A camera or phone for photographs
- A notebook and pen for labelling
Step 1: Assess and Photograph Your Antique Furniture
Start every piece with an honest assessment and a full set of photographs. This takes ten minutes and pays for itself many times over.
Photograph each item from all angles, including the underside, before you wrap anything. Capture existing scratches, chips, loose joints and water marks. These images protect you if a damage claim is needed later, and they remind you how the piece should look when reassembled.
Then test the piece by hand:
- Gently rock it to check for wobbling legs or a loose frame
- Open and close drawers and doors to feel for sticking or sagging
- Press lightly on veneered surfaces to find lifting edges
- Check for woodworm by looking for small round exit holes and fine dust
Label anything already damaged with a small removable sticker. Tell your removals team about it on the day.
Step 2: Choose the Best Packing Materials for Antique Furniture
The best packing materials for antique furniture are acid-free and breathable. Standard bubble wrap alone is not enough, and plastic sheeting should never sit directly against a finished surface.
Different materials do different jobs. Acid-free tissue protects finishes from chemical reactions. Cotton cloth and sheets cushion without trapping moisture. Bubble wrap absorbs impact but can leave marks on soft finishes if used alone. Foam tubing guards legs and edges, while cardboard corner protectors stop knocks during loading.
| Material | Protects Against | Use On |
|---|---|---|
| Acid-free tissue | Staining, finish reactions | Bare and polished wood |
| Cotton cloth or sheets | Scuffs, light impact | All surfaces |
| Bubble wrap | Impact, vibration | Over a cloth layer |
| Foam tubing | Edge and leg damage | Legs, arms, corners |
| Corner protectors | Loading knocks | Outer edges |
Step 3: How to Protect Wood Finish During a Move
Protecting wood finish during a move comes down to three things: a breathable barrier, cushioning, and stable temperature. Never seal antique wood in plastic, because trapped moisture causes swelling, warping and mould (canada.ca).
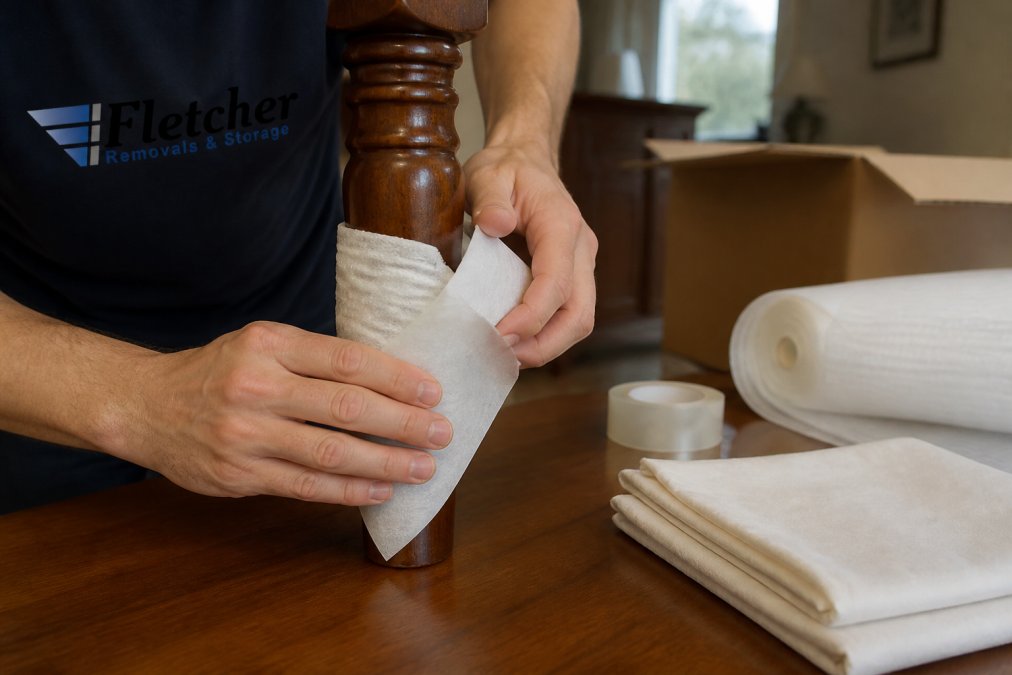
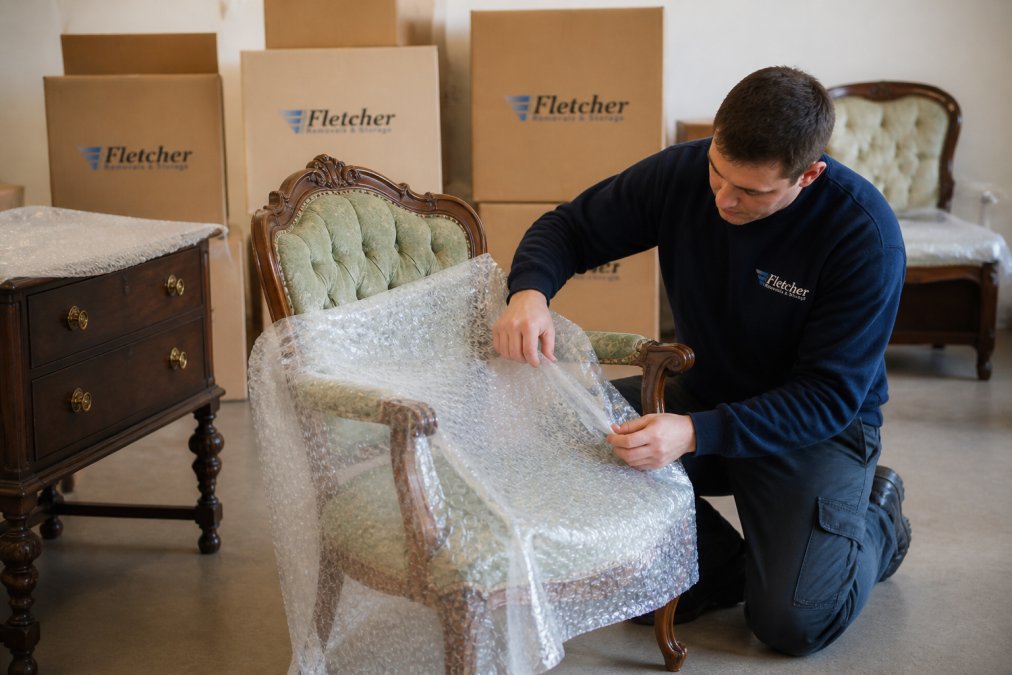
Begin with a layer of acid-free tissue over the whole piece, tucking it into carvings and joints. Follow with cotton cloth, then bubble wrap for the outer cushion. Tape only the wrapping, never the furniture itself.
French-polished and waxed surfaces are the most delicate. Wax finishes soften in heat, so keep wrapped pieces out of direct sunlight and away from radiators before the move. If a piece has a loose veneer, do not press it down. Support it with tissue and flag it for your removals team.
Step 4: Wrap and Cushion Delicate Legs, Carvings and Veneers
Delicate legs, carvings and veneers need individual attention because they are the parts most likely to snap or lift. Wrap each leg separately, pad every protruding carving, and support veneered edges so they cannot catch on anything.
For legs, slide foam tubing over the full length, then wrap with bubble wrap and secure with low-tack tape. For carved details, build up small pads of tissue and cotton until the carving sits proud of the surrounding surface, so nothing presses directly on it. For veneers, run a strip of cardboard along the edge and tape it in place, leaving the face of the veneer untouched.
Remove or secure anything that moves: drawers, shelves, glass panels and loose handles. Tape drawers shut with low-tack tape, and bag small fittings so they travel with the piece.
Step 5: Secure Items During Transit and Loading
Securing items during transit means the piece cannot slide, rock or press against anything hard. Blankets and straps do the work, and the aim is a snug load with no movement.
Wrap each piece in a furniture blanket after its protective layers. Stand larger items upright where the design allows, because most antique furniture is strongest in its normal position. Lay mirrors, glass tops and marble slabs flat and separately, never stacked under heavy items.
Load heavy pieces first, against the bulkhead, and lighter items around them. Use moving straps to pin everything to the van walls. Leave no gaps that let a piece shift on corners or during braking.
Moving Insurance for High-Value Items: What You Need to Know
Moving insurance for high-value items is not the same as standard cover, and most household policies will not pay out for damage that happens during a move. Check your cover before moving day, not after.
Standard contents insurance often excludes goods in transit or limits the payout for antiques. Specialist removal firms carry Goods in Transit and Public Liability Insurance, which is the cover that actually applies while your belongings are on the road. Fletcher Removals and Storage holds both, so your pieces are protected from the moment they are loaded.
For genuinely high-value antiques, consider a professional valuation. Insurers may ask for proof of value, and a written valuation supports a claim far better than a receipt. The Association of British Insurers guidance on home contents is a sensible starting point for understanding what your policy does and does not cover.
Common Mistakes to Avoid When Packing Antiques
The biggest mistakes when packing antiques are using the wrong materials and rushing the wrapping. Both cause avoidable damage.
Watch for these:
- Wrapping bare wood in newspaper, which stains the finish
- Sealing pieces in plastic, which traps moisture and warps the timber
- Taping directly onto furniture instead of onto the wrapping
- Leaving drawers and doors unsecured so they swing open in transit
- Stacking heavy items on top of delicate pieces
- Skipping photographs, which makes any claim far harder to prove
If a piece is especially valuable or fragile, the safest option is to let a professional team handle it. Fletcher Removals and Storage offers a full packing service with trained, uniformed staff, dismantling and reassembly, and secure onsite storage if you are between homes. Our transparent pricing means no hidden fees, and our personalised approach means every enquiry, large or small, gets the same care.
Frequently Asked Questions
What is the best way to wrap antique furniture for moving?
Start by cleaning and drying the piece, then wrap it in acid-free tissue paper or a soft cotton sheet to protect the finish. Follow with a layer of bubble wrap, secured with low-tack tape, and cushion corners with foam or cardboard. For carved or delicate areas, use crumpled tissue paper to fill gaps. Always keep tape off the wood itself to avoid pulling away the finish when you unwrap.
Should I use bubble wrap on antique wood furniture?
Bubble wrap is safe for most antique wood furniture as long as it is not placed directly against a fragile or flaking finish. Wrap the item first in acid-free tissue or a soft cloth, then add bubble wrap as the outer protective layer. For pieces with loose veneer or gilding, use foam padding instead, as bubble wrap can leave marks or lift delicate surfaces over time.
Do I need specialist insurance for moving antique furniture?
Standard home contents insurance often does not cover antiques during a move, especially high-value pieces. Specialist moving insurance for high-value items provides cover for accidental damage, loss, and transit risks. Check whether your removals company includes Goods in Transit and Public Liability Insurance, and ask for a written summary of what is covered, the excess, and how to make a claim if something goes wrong.
Can I use cardboard boxes for antique furniture?
Cardboard boxes are not ideal for large antique furniture because they offer little structural support and can trap moisture. Use them only for small detachable parts like handles, castors, or screws, and label each box clearly. For the main piece, rely on padded blankets, foam boards, and custom crating where needed. If you must use cardboard, reinforce it and avoid direct contact with bare wood.
Packing fragile antique furniture by hand is achievable, but the risk rises with every piece you are unsure about. If you would rather not take that chance, Fletcher Removals and Storage can take it off your hands entirely, from careful wrapping and furniture dismantling to secure transit and storage. Get started with Fletcher Removals and Storage and move your antiques with confidence.