 how-to
How to Label Moving Boxes Effectively: 7 Simple Steps
Table of Contents
- Why Effective Moving Box Labels Save You Time and Stress
- What You'll Need Before You Start Labelling
- Step 1: Choose the Right Labels and Markers
- Step 2: What to Write on Moving Box Labels
- Step 3: Use Colour-Coded Moving Box Labels for Instant Room Sorting
- Step 4: Follow a Moving Box Label Template for Consistency
- Step 5: Where to Put Labels on Each Box
- Step 6: Mark Fragile and High-Value Items Clearly
- Step 7: Keep a Moving Inventory Checklist
- Common Labelling Mistakes to Avoid
- Frequently Asked Questions
Last Updated: October 21, 2026
Why Effective Moving Box Labels Save You Time and Stress
Learning how to label moving boxes effectively is the difference between a calm move and a chaotic one. At Fletcher Removals and Storage, we have helped domestic and commercial clients across Coventry and the wider UK move, and the pattern is always the same. Boxes with clear labels get unpacked in days. Boxes with vague scribbles sit in hallways for weeks.
A well-labelled box tells you three things at a glance: which room it belongs in, what is inside, and whether it needs careful handling. Miss any of those and you are guessing. Guessing costs time on moving day and again when you unpack.
Here is what most guides get wrong. They treat labelling as a last-minute job you do while taping boxes shut. In practice, labelling works best as a system you set up before the first item goes into a box. Below, we walk through seven steps that make that system easy to follow, plus the mistakes that undo all your good work.
What You'll Need Before You Start Labelling
Get your labelling supplies together before packing begins. Stopping halfway through to hunt for a marker breaks your rhythm and leads to half-labelled boxes.
You will need:
- A permanent marker, ideally a thick chisel tip for bold writing
- Plain labels or sticky notes, plus clear tape to secure them
- Coloured sticker dots or coloured tape for room coding
- A printed room list so everyone uses the same names
- A notebook or spreadsheet for your inventory
- Packing tape and a tape dispenser
Buy more labels than you think you need. Running out mid-pack is exactly when people start skipping labels. A spare marker is also worth keeping in your pocket.
If you are packing a whole house, set up a labelling station in one room. Keep all supplies there and pack boxes near it where you can. This one habit keeps your labels consistent from the first box to the last.
Step 1: Choose the Right Labels and Markers
The right label choice comes down to three things: it must stick, it must survive handling, and it must be readable from a distance.
Plain paper labels work well, but only if you press them down firmly on a dry, dust-free surface. Cheap labels peel at the corners once a box is stacked. If you are moving in wet weather or storing boxes for a while, use plastic labels or write directly on the box with a permanent marker.
Marker choice matters more than people expect. A thick chisel-tip permanent marker writes bold letters that stay readable across a room. Thin ballpoint pens fade into the cardboard and force you to squint.
Avoid these label types:
- Felt-tip pens that bleed through and smudge
- Removable labels that slide off during transit
- Pencil, which rubs away completely
One insider tip: write on the top and the side of each box. When boxes are stacked, only the side labels show. When they sit on the floor, the top label is what you see first.
Step 2: What to Write on Moving Box Labels
Every moving box label should carry four pieces of information. Anything less and the label fails when you need it most.
Write these on each box:
- Room name in large letters, such as KITCHEN or BEDROOM 2
- A short contents list, such as "pans, plates, mugs"
- A priority marker: a number from 1 to 3 for unpacking order
- Handling notes where needed, such as FRAGILE or THIS WAY UP
Keep the room name big and the contents small. The room name is what gets read first and most often. Contents are for the person unpacking, not the person carrying.
Use the same room names on every box and on your room list. If one box says "Lounge" and another says "Living Room", you have created two piles on moving day. Pick one name per room and stick to it.
Step 3: Use Colour-Coded Moving Box Labels for Instant Room Sorting
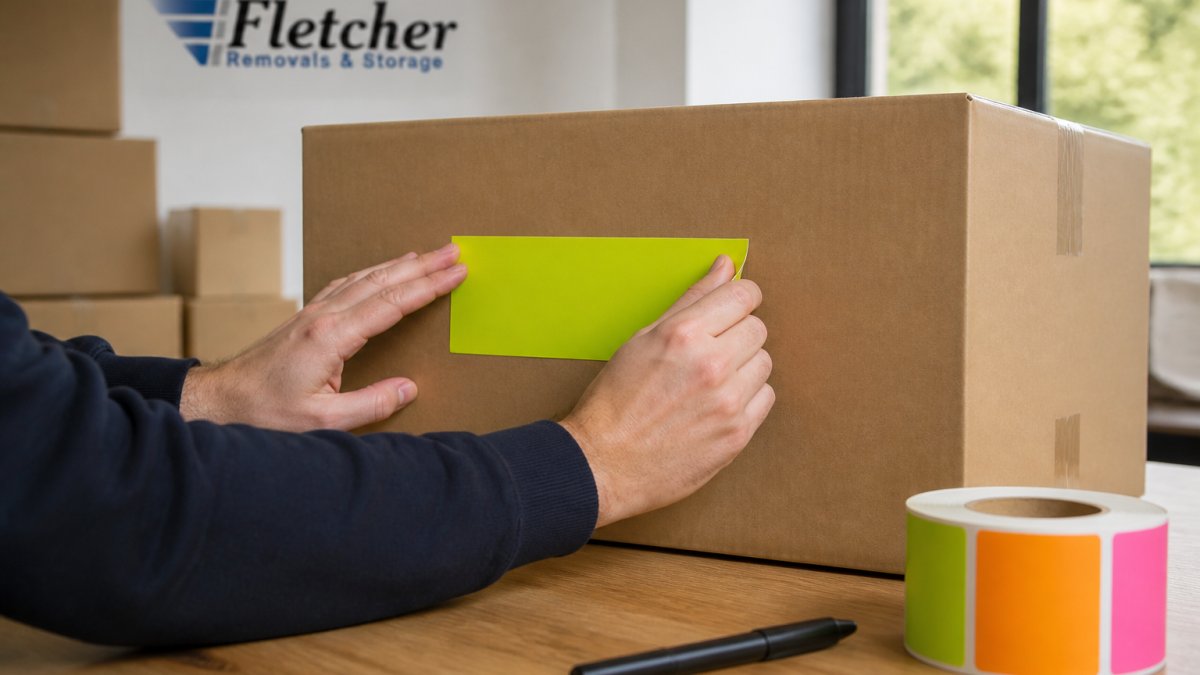
Colour-coded moving box labels let anyone sort a stack of boxes in seconds, without reading a single word. Each room gets its own colour, and every box for that room gets a matching sticker or strip of coloured tape.
Set up your colour key before packing:
- Red for kitchen
- Blue for main bedroom
- Green for bathroom
- Yellow for living room
- Orange for children's rooms
- Purple for office or study
Post the colour key on the wall where you are packing and take a photo of it. Give a copy to whoever is helping you, and keep one on your phone for moving day.
Colour coding pays off most when several people are carrying boxes. A removal team can send every red box to the kitchen without stopping to read labels. It also helps when boxes from different rooms look identical.
Choose colours you can tell apart at a glance. Avoid pairing similar shades like light blue and dark blue. Bold, distinct colours do the job better.
Step 4: Follow a Moving Box Label Template for Consistency
A moving box label template keeps every label in the same format, so your eye always knows where to look. You can draw one by hand in seconds.
Here is the template we recommend:
+---------------------------+
| ROOM: ______________ |
|---|
| PRIORITY: 1 / 2 / 3 |
| CONTENTS: ___________ |
| [ ] FRAGILE [ ] THIS |
| WAY UP |
| BOX __ OF __ |
| +---------------------------+ |
| The "box X of Y" line is the part most people skip, and it is the most useful. If you know the kitchen has twelve boxes, you can confirm all twelve arrived before you start unpacking. |
Print a sheet of these labels or draw them onto plain stickers before packing day. Filling in a template takes seconds. Deciding what to write from scratch each time slows you down and produces inconsistent labels.
For a business move, a template matters even more. Office moves often involve several people packing at once, and a shared template keeps every box labelled the same way.
Step 5: Where to Put Labels on Each Box
Put labels on the top and at least one side of every box. Those are the two surfaces visible when boxes are stacked or lined up against a wall.
Place the side label in the upper half of the box, not near the bottom. Bottom labels disappear behind other boxes and get scuffed on floors. Keep labels away from seams, corners and tape lines, where they peel first.
A few placement rules worth following:
- Never label the bottom of a box
- Keep labels flat and smooth, with no bubbles at the edges
- Avoid labelling over old print or previous stickers
- Write before you seal the box, so you do not forget
If a box is heavy, add a note on the side facing outwards. Whoever lifts it will see the warning before they strain their back.
Step 6: Mark Fragile and High-Value Items Clearly
Fragile and high-value items need more than a label. They need a label nobody can miss.
Use bold, block capitals for the word FRAGILE, and add arrows pointing up if the box must stay upright. Write the warning on every side you can reach, not just the top. A box marked on one side only gets turned around in the van.
For high-value items, add a short note of what is inside, such as "TV, do not stack" or "glassware, 6 pieces". This tells the carrier to handle the box with care and helps you spot it quickly at the other end.
For antiques and very delicate pieces, consider packing and labelling those boxes yourself, or ask your removal team to pack them. Items like these often deserve a dedicated label listing each piece inside.
Step 7: Keep a Moving Inventory Checklist
A moving inventory checklist is a numbered list of every box you pack, matched to its label. It is your proof that everything arrived and your map for unpacking.
Build it as you pack, not afterwards. Record the box number, room, contents and priority for each box. A simple spreadsheet works well, and a notebook is fine too.
Your checklist lets you:
- Confirm every box arrived before the van leaves
- Find a specific item without opening twenty boxes
- Spot missing boxes before they become a problem
- Hand a clear record to your removal team
Number boxes in the order you pack them, and keep the checklist somewhere you will not pack it by accident. Your phone notes app is a safe home for it.
Common Labelling Mistakes to Avoid
Most labelling problems come from a handful of repeat mistakes. Fix these and your move gets noticeably easier.
Watch out for:
- Labelling only the top of boxes, which vanishes once boxes are stacked
- Vague contents notes like "stuff" or "misc", which tell you nothing later
- Inconsistent room names, which split one room's boxes into two piles
- Forgetting the priority number, so everything gets unpacked at once
- Using a pen that fades, leaving blank labels by moving day
- Labelling after sealing, when you have already forgotten what went in
The fix for all of these is the same: set up your system first, then pack. A minute spent on labels saves an hour of searching later.
If labelling and packing feel like too much on top of everything else, that is exactly the kind of work we take on. Fletcher Removals and Storage offers a full packing service, furniture dismantling and assembly, and secure onsite warehouse storage for clients across Coventry and the surrounding areas. Our trained, uniformed staff handle fragile and high-value items with care, and we carry Goods in Transit and Public Liability Insurance. We have been established since 2013, with a high rate of repeat business from local homes and commercial clients.
Frequently Asked Questions
Should you label moving boxes by room or by contents?
Label by room first, then list the main contents underneath. The room tells the removal team where each box goes in your new home, while the contents list helps you find specific items without opening every box. For example, write 'Kitchen - pots, pans, utensils' rather than just 'Kitchen'. This two-part approach makes unpacking faster and reduces the chance of boxes ending up in the wrong room.
How do you mark fragile boxes for a move?
Write 'FRAGILE' in large capital letters on at least two sides of the box, and add arrows pointing up so handlers know which way to carry it. Use a red marker or red fragile stickers to make it stand out. Also note what is inside, such as 'glasses' or 'mirror', and place fragile boxes on top of heavier ones when stacking. Tell your removal team which boxes are fragile before they start loading.
What is the best way to keep track of moving boxes?
Number every box and keep a moving inventory checklist that matches those numbers. Record the box number, room, and a brief contents summary in a spreadsheet or notebook. Keep the checklist with you on moving day and check boxes off as they are loaded and unloaded. This system helps you confirm nothing is missing and makes it easy to find essentials like kettles or phone chargers.
Where should you put labels on moving boxes?
Place labels on the top and at least one side of each box so they are visible whether boxes are stacked or side by side. Avoid covering the box seams or handles with labels. Write the room name and box number in large letters on the top, and put the more detailed contents list on the side. This way, you can identify boxes quickly from above and from the side during loading and unloading.
Moving house is stressful enough without spending your first week hunting through unmarked boxes for the kettle. A clear labelling system, set up before you pack a single item, removes most of that friction. If you would rather hand the whole job to a team that does this every day, Fletcher Removals and Storage can pack, label, transport and store your belongings from start to finish. Get in touch for a quote and let us take the weight off your moving day.