 how-to
How to Dismantle Large Furniture Safely
Table of Contents
- Why Dismantling Large Furniture Matters
- Best Tools for Furniture Disassembly
- Preparing Your Furniture for Dismantling
- How to Label Furniture Parts for Moving
- Moving Heavy Furniture Through Tight Spaces
- Safety Precautions When Dismantling Large Furniture
- Reassembling Your Furniture at Your New Home
- Frequently Asked Questions
Last Updated: September 18, 2026
Why Dismantling Large Furniture Matters
Moving house is stressful enough without struggling to fit a sofa through a doorway. When you dismantle large furniture safely, you transform a potential nightmare into a manageable task. At Fletcher Removals and Storage, we've helped families and businesses move their belongings without damage or injury.
Dismantling large furniture safely serves three critical purposes. First, it protects your possessions from scratches, dents, and structural damage during transit. Second, it keeps you and your moving team safe from dropped items or strains. Third, it makes tight spaces navigable, a bed frame that won't fit through a hallway becomes simple once you remove the headboard and side rails.
Many people underestimate this step. They try to force furniture through spaces it won't fit, or they rush the process and miss important hardware. The result is damaged items, wasted time, and unnecessary stress on moving day.
Professional movers understand that proper dismantling requires planning. You need the right tools, clear labelling, and knowledge of where each bolt and screw belongs. This guide walks you through every stage of how to dismantle large furniture safely, from preparation through reassembly at your new home.
Best Tools for Furniture Disassembly
The right tools make dismantling large furniture safely straightforward and efficient. You don't need an extensive workshop. A focused set of essentials covers nearly every common furniture piece.
Essential tools for furniture disassembly:
- Cordless drill-driver - removes screws quickly without hand fatigue
- Adjustable spanner set - fits bolts of different sizes
- Screwdriver set - includes Phillips and flat-head drivers for various screw types
- Hex key set - essential for modern flat-pack and modular furniture
- Rubber mallet - gently taps joints apart without damaging wood or finishes
- Pry bar - carefully separates panels and frames
- Needle-nose pliers - grips small hardware and springs
- Notepad and pen - records screw locations and assembly steps
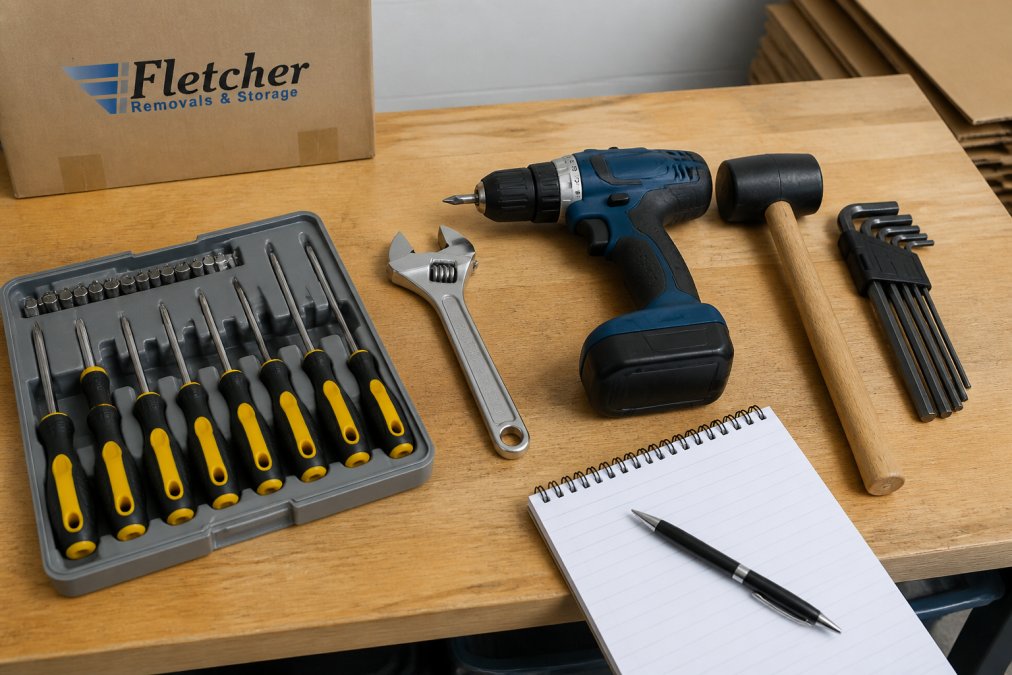
A cordless drill saves significant time. Hand-driving dozens of screws exhausts your hands and slows progress. Modern drills are affordable and reliable. Rent one if you don't own one, the time savings justify the cost.
The rubber mallet is often overlooked but invaluable. It separates joints without splitting wood or cracking veneers. Tap gently around the joint rather than striking hard in one spot.
Keep hardware organised as you remove it. Small bags work well for screws from individual pieces. Label each bag clearly with the furniture item and assembly location.
Preparing Your Furniture for Dismantling
Before you touch a tool, spend time preparing. This step prevents damage and makes the actual dismantling process faster.
Clear the space around your furniture. Move other items away so you have room to work. Lay down a protective blanket or cardboard to catch dropped hardware and protect floors from scratches.
Take photographs. Use your phone to photograph each piece from multiple angles before you start. Capture how panels connect, where bolts sit, and how legs attach. These images become invaluable during reassembly months later.
Read any assembly instructions. If you have the original flat-pack instructions, read them backwards. Assembly instructions show exactly how pieces fit together, reverse the steps to dismantle safely.
Identify the disassembly sequence. Large furniture usually comes apart in a specific order. For example, remove cushions before the frame, legs before the main structure. Working in the wrong order can trap bolts or damage joints.
Inspect for damage before you start. Note any existing cracks, loose joints, or worn areas. This protects you if damage occurs during dismantling, you'll know what was already present.
Many people skip this preparation and regret it during reassembly. Photographs take five minutes but save hours of frustration later.
How to Label Furniture Parts for Moving
Labelling is the difference between reassembling furniture quickly and spending hours searching for matching pieces. Clear labelling prevents lost hardware and ensures nothing gets mixed up with other items.
Create a labelling system before dismantling. Use a consistent format. For example: "SOFA-FRAME-LEFT-LEG" or "BED-HEADBOARD-BOLT-SET-1". Include the furniture item, the specific part, and a sequence number if there are multiple identical pieces.
Label everything as you remove it. Don't wait until you've dismantled the entire piece. Label parts immediately, while you remember where they came from.
Use multiple labelling methods for important items. Write labels on masking tape attached to parts. Place a second label inside plastic bags containing hardware. For valuable or antique furniture, photograph each stage and note the label in your phone's photo description.
Group hardware by furniture piece. Use small grip-seal bags or containers. Write the same label on the bag as on the corresponding furniture part. This prevents bolts from a sofa ending up mixed with screws from a bed frame.
Create a master inventory list. Write down each furniture item, its parts, and where the hardware bag is stored. Keep this list with you during the move. Reference it when unpacking to confirm nothing is missing.
For flat-pack furniture, keep original packaging if possible. Original boxes often have assembly diagrams printed on them. These diagrams make reassembly straightforward. If original boxes are unavailable, create your own labels and diagrams.
Professional removal services like Fletcher Removals and Storage use detailed labelling systems to track items. Applying the same discipline to your own move prevents costly mistakes.
Moving Heavy Furniture Through Tight Spaces
Getting large furniture through doorways, hallways, and staircases challenges many people. Dismantling large furniture safely often means breaking pieces into manageable sizes that fit through tight spaces.
Measure doorways and hallways before moving day. Use a tape measure to check widths, heights, and diagonal clearances. A sofa might fit through a doorway width-wise but not diagonally. Knowing these measurements in advance prevents last-minute scrambling.
Remove doors from hinges temporarily. Door frames often add 5-10 centimetres of obstruction. Unhinged doors create extra clearance for large items. Keep hinges and screws together in a clearly labelled bag.
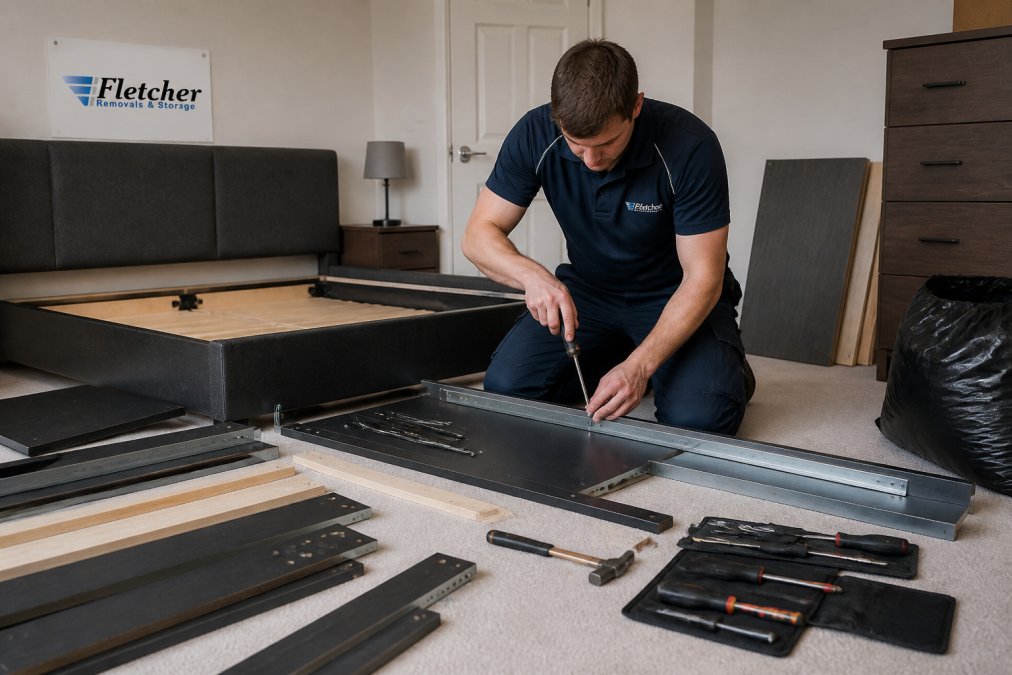
Disassemble furniture to its smallest safe components. A bed frame separates into headboard, footboard, side rails, and slats. A sofa loses its legs and arms. Sectional sofas separate into individual sections. Breaking pieces down maximises your options for navigating tight spaces.
Angle furniture strategically. A piece that won't fit straight through a doorway often passes through at an angle. Tilt, rotate, or stand items on edge. Test angles before committing to moving, a few seconds of trial saves damage.
Use furniture sliders on floors. Sliders reduce friction and protect flooring. They also make it easier to manoeuvre heavy pieces through tight spaces. Cardboard, plastic sheeting, or commercial sliders all work.
Protect walls and doorframes. Wrap corners with blankets or cardboard. Furniture edges catch on walls and damage paint and plaster. A few minutes of protection prevents costly repairs at your old property.
Ask for help. Moving large furniture through tight spaces requires multiple people. Attempting it alone risks injury and damage. Friends, family, or professional movers make the process safer and faster.
Safety Precautions When Dismantling Large Furniture
Dismantling large furniture safely means protecting yourself and others from injury. Several hazards emerge during this process, sharp edges, heavy components, and trapped fingers among them.
Wear appropriate protective equipment. Wear work gloves to protect hands from splinters, sharp metal edges, and pinch points. Safety glasses protect your eyes from dust and small flying debris. Steel-toed boots protect feet if heavy items drop.
Keep your back safe. Lift with your legs, not your back. Bend at the knees and keep the load close to your body. For heavy components, use a sack truck or ask for help. Back injuries from furniture moving can cause lasting problems.
Secure loose parts before moving. Drawers, shelves, and panels can shift during transport. Secure them with rope or moving blankets. Loose parts create hazards for anyone nearby.
Never work alone with large furniture. One person cannot safely control a heavy sofa or wardrobe if it shifts unexpectedly. Always have a second person present.
| Safety Concern | Prevention Method | Why It Matters |
|---|---|---|
| Back strain | Lift with legs, use sack trucks | Prevents long-term injury |
| Pinched fingers | Keep hands clear of joints | Avoids fractures and lacerations |
| Dropped items | Secure loose parts | Protects feet and property |
| Trip hazards | Clear work area | Prevents falls and injuries |
| Eye injury | Wear safety glasses | Protects vision from debris |
Reassembling Your Furniture at Your New Home
Reassembly reverses dismantling, but organisation determines success. With proper labelling and photographs, reassembly becomes straightforward.
Frequently Asked Questions
What tools do I need to dismantle large furniture safely?
Essential tools include a cordless drill, adjustable spanner, screwdriver set (both Phillips and flathead), hex keys, rubber mallet, and a small torch for tight spaces. Keep a notebook handy to photograph or sketch connections before disassembly. Most households have these items already. A cordless drill speeds up the process considerably when removing multiple fasteners. Always check your furniture's assembly manual if available, it shows exactly which tools you'll need and the correct removal sequence.
How do I keep track of screws and bolts when taking furniture apart?
Use small plastic bags or containers labelled with the furniture piece and assembly step number. Take photos of each stage before removal, showing exactly where fasteners go. Write directly on bags with a permanent marker: 'Wardrobe, back panel, 8 screws, 4 bolts.' Group related hardware together in grip-seal bags taped to the corresponding furniture piece itself. This method ensures nothing gets lost and reassembly becomes straightforward. Number each bag sequentially so you follow the reverse order when reassembling.
Is it better to dismantle furniture or move it whole?
Dismantling works best for large pieces like wardrobes, beds, and bookcases that won't fit through doorways or stairwells. Smaller items often move faster and safer intact. Consider your new home's layout, doorway widths, and staircase dimensions before deciding. Dismantling takes time but prevents damage to walls, doorframes, and the furniture itself. Professional removals teams assess each piece individually, some items are simply safer transported whole if they fit your space.
What should I do if a piece of furniture cannot be dismantled safely?
Some items like glued veneers, old upholstered frames, or antique pieces risk permanent damage if disassembled. In these cases, wrap them thoroughly with blankets and moving pads, secure with plastic wrap, and move them whole. Measure your doorways and hallways carefully to confirm they'll fit. If a piece genuinely won't pass through any route, professional removals teams have experience manoeuvring awkward items or can suggest alternatives like temporary removal of doors or careful tilting techniques. Never force furniture through tight spaces.